
How to Create a Search
The file search in Netcontent allows you to locate a specific case using various search methods. These searches can be saved so that they can be used by users in the future.
Saved searches can be used either by the user who created them or made public for all platform users. This option is defined when creating the search and can be modified later if needed, as well as any other parameters stored in the original search.
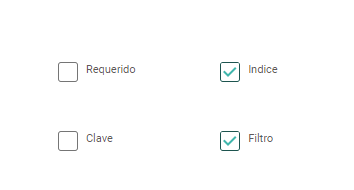
For a field to be used in a search, the "Index" function must be enabled for quick searches, and the "Filter" function for complete searches in the file fields.
Quick Access Searches
Quick searches are those that can be performed directly from the fil window with pending tasks, in validation, or from a previously completed search. These searches can be conducted using the case ID, name, task, or index fields.
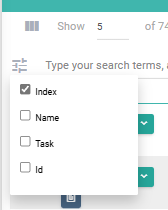
Once we know the type of filter we will use for the search, enter it in "Enter the search and press ENTER," and follow the instructions.

In this example, if we want to search for a file that contains the value "06/10/2022" in the "date" field, we must perform an instant search of the index type. Enter this search as a filter, and then press ENTER.
Advance Searches
By expanding the left panel of the system, select one of the case types to which you have access and wish to search. Then, click on the magnifying glass icon.
We will access the advance search creation tab, where we will see something similar to the following:

The number of fields displayed in this tab will vary depending on the index fields defined and the permissions assigned to the specific file type within your profile.
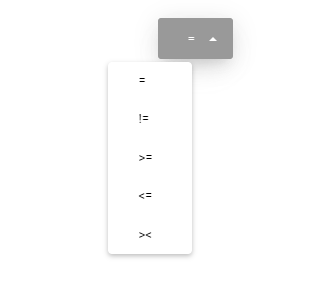
In each field, you can perform searches to find a specific set of cases, depending on the accuracy of your filter values. These filters can be applied using values equal to (=), greater than or equal to (>=), less than or equal to (<=), not equal to (!=), or between two values (><).

Now you have the option to perform a quick search .  or save it so that it can be used multiple times in the future.
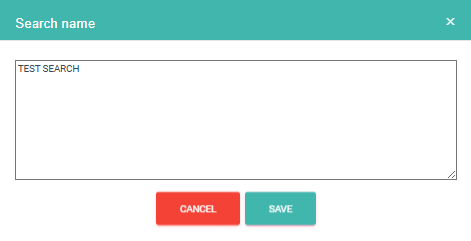
In case you require to save the search, the system will prompt us to give it a name, allowing us to visually identify this search each time we want to use it.
Once we save the name, the screen will display two new options:
 :
:
Default Search: By enabling this option, Netcontent will set the created search as your default each time you click on the left side panel. This means that clicking on the name of your case type will automatically apply this search, saving you time every time you log in.
 :
:
Public Search: By enabling this option, Netcontent will allow all platform users to use the search you are creating.

Then, to perform the search with the established patterns, we must press the button  located at the top. The system will then carry out the search across all cases for that specific Case Type, applying the selected filter criteria.
On the right side of the search window, we have other special criteria, which are based solely on the values provided by the system when the Case is created.
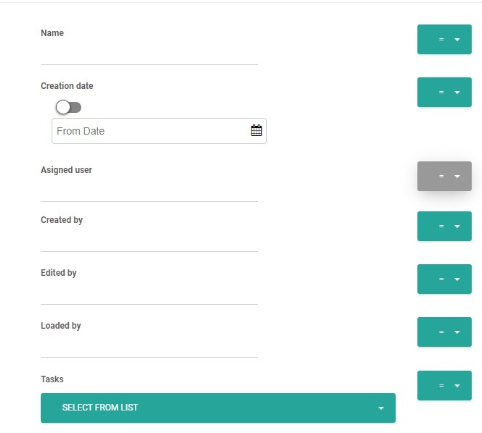
Some of the generic fields provided by the system include:
- Case ID
- Name
- Start Date
- Modification Date
- Assigned User
- Created By
- Modified By
- Uploaded By
- Tasks (all tasks from the "MAIN WORKFLOW" flow of our case type will appear)
- Files (the file name will be used)
- Expired
- Deactivated
- Companies
Created with the Personal Edition of HelpNDoc: Streamline Your Documentation Creation with a Help Authoring Tool