
Creating a Link
There are two ways to create a link to generate a form.
Method One
Using an email account to generate the link and modify the parameters as required.
When you access this link, a form is displayed, and upon saving, a new record is generated with the entered data. Anyone can access this link; having a Netcontent user is not necessary. However, it does use a license user, so the form cannot be accessed if all possible users are already logged in.
Step 1
Create the record type that will be generated with the form, including the fields that will appear on the screen. There may be additional fields that will not be visible on the form but will be used later in a process.
It is also important to have an attachment field named "PAGE_IMAGES" where the completed form PDF will be stored.
Step 2
In the record types, go to the forms section:

Step 3
Create a new form, press the "Edit" button, provide a name, and proceed to save it.

Step 4
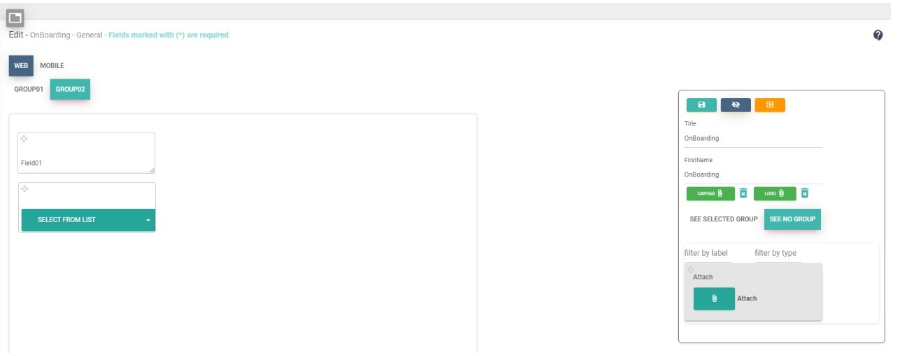
If there is a background PDF for the form, upload it as the canvas.
Place the fields and drag each one to its corresponding position.
Step 5
To start, go to Processes and design a Main Module as follows:
Create a new main process for the record:
Start -> Send Mail -> End
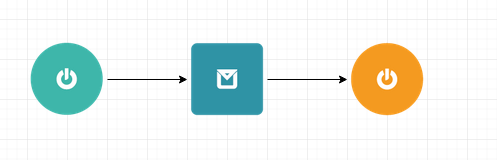
This is only a temporary process to generate the link. Complete the minimum required fields to make it functional.
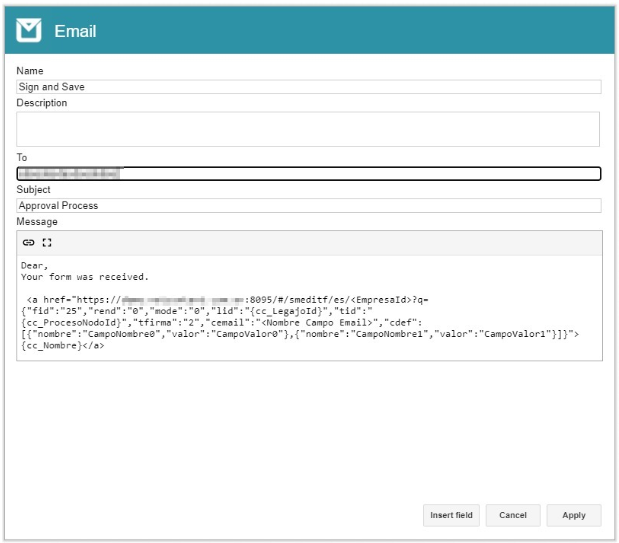
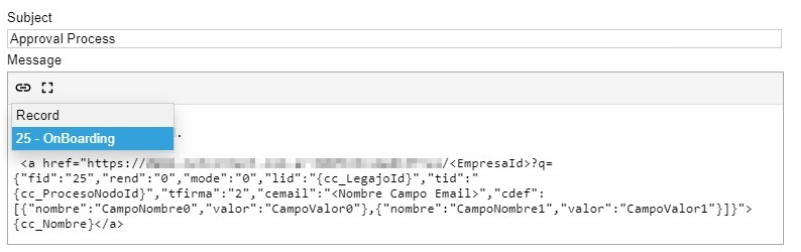
Set an email as the recipient, and in the email body, use the "Insert Link" button to select the form you just created.
Step 6
A link similar to the following is generated:
<a href="http://localhost:8080/#/smeditf/es/<EmpresaId>?q={"fid":"2","rend":"0","mode":"0","lid":"{cc_LegajoId}","tid":"{cc_ProcesoNodoId}","tfirma":"2","cemail":"<Nombre Campo Email>","cdef":[{"nombre":"CampoNombre0","valor":"CampoValor0"},{"nombre":"CampoNombre1","valor":"CampoValor1"}]}">{cc_Nombre}</a>
- localhost is the server address. Replace it with the appropriate IP to access it from outside the server.
- <CompanyId> is the ID of the company as defined in Netcontent. If there is only one company, simply replace it with 1.
- fid corresponds to the form ID. Make sure to use the correct one when selecting the link.
- rend indicates how the form is rendered. 1 is responsive, and 0 is not responsive (absolute position, respects the position given in the designer).
- mode specifies if a receipt is created when the form is saved.
- 0: Creates a new receipt by scanning the screen with the canvas (only possible if rend=0; otherwise, it returns an error).
- 1: Creates a new receipt using the HTML template (returns an error if the HTML does not exist; in development).
- 2: Does not generate a receipt.
- 3: Creates a receipt if it doesn't exist by scanning the screen with the canvas (only possible if rend=0; otherwise, it returns an error).
- 4: Creates a receipt if it doesn't exist using the HTML template (returns an error if the HTML does not exist; in development).
- 5: Creates a receipt by scanning the screen with the canvas and replaces the existing PDF.
- 6: Creates a receipt using the HTML template and replaces the existing PDF.
- lid is the record ID. If it is 0, it indicates that a new record is created; if it is greater than 0, it indicates an update.
- tid corresponds to the type ID. Use {cc_ProcessNodeId} or the ID of the node where the record will be edited if it is an existing record, or use {cc_RecordTypeId} if it is a new record (when lid is 0).
- tfirma indicates if any file in the form needs to be signed (whether a receipt or another existing file).
- 0: No signature required.
- 1: In-person only.
- 2: In the cloud with OTP (if authenticated, asks for the PIN configured in Netcontent) and in-person.
- 3: In the cloud without OTP (not suitable for unauthenticated users) and in-person.
- 4: In the cloud with OTP only (if authenticated, asks for the PIN configured in Netcontent).
- 5: In the cloud without OTP only (not suitable for unauthenticated users).
Note that when using a Netcontent user (authenticated), OTP is not sent regardless of the configuration.
- cemail indicates the email that will be used for signing. It can be a fixed value or a dynamic field in the record (specified with the field name). Returns an error if a signature is required and the resulting value is not an email type.
- cdef sets the default values used to initialize the form. It is an "array" of objects {"nombre":"fieldName1","valor":"value1"}, where "nombre" is the field name and "valor" is the value it will take.
It should look like the following example:
<a href="http://localhost:8080/#/smeditf/es/1?q={"fid":"2","rend":"0","mode":"0","lid":"0","tid":"{cc_LegajoTipoId}","tfirma":"0","cemail":"mail","cdef":[{"nombre":"CampoNombre0","valor":"CampoValor0"},{"nombre":"CampoNombre1","valor":"CampoValor1"}]}">{cc_Nombre}</a>
Step 7
After saving and publishing the process, go to the Records list and create a new record. It is not necessary to complete any fields unless there are mandatory ones. Press "Save and Activate" the record.
Step 8
You will receive an email with a link (if the email is not sent, check the Alerts table in the Netcontent database). This link can be used from any device that can access the Netcontent server.
Access the link, complete the data, and save it.
Remember, there must be a free user available to access the form. If necessary, current sessions can be deleted by clearing the NC_SYS_Sessions table.
Then, log back into Netcontent with your user and verify that the record was created correctly. If so, you can deactivate the temporary process and create the appropriate process for the record flow.
The link received via email can be distributed as needed. Each time someone accesses it, completes the data, and saves, a new record will be generated.
Method 2
Automatically Generate the Form
Once steps 1 to 4 of the previous procedure are completed, go to the record type that contains this designed form.
In this manual's example, a form in the "Personnel" section is used.
Select the desired record type.

In the displayed options, select "New Record" to see the following:
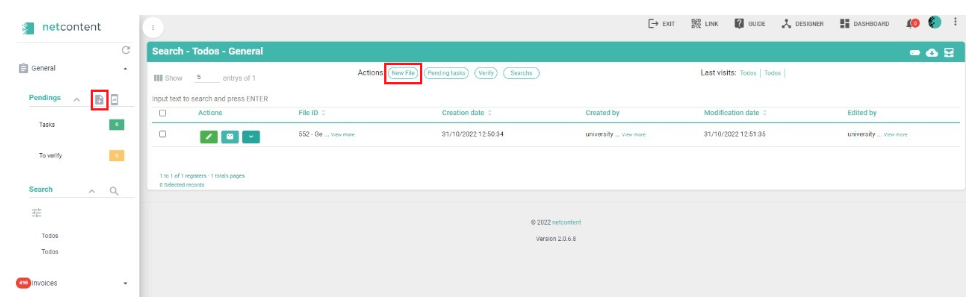
Select "Generate Alert" (this allows you to generate the form link automatically).

You can view the names of the forms created for the selected record type. Select the "Eye" symbol next to the name to access the form.
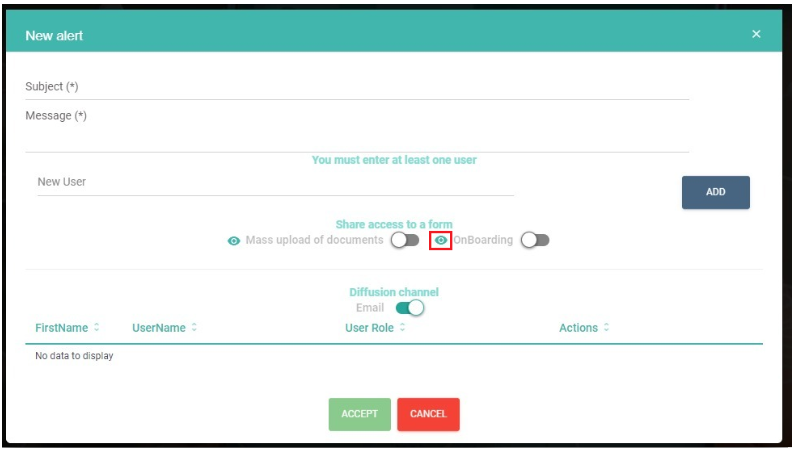
As shown in the image, the form is generated in a web browser window. You can interact with it directly.

 Note:
Note:
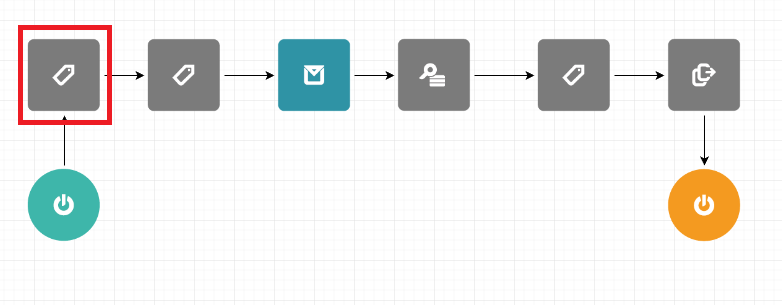
To ensure the form works correctly, a "Main Flow" must be active: Link. Without this, the form will not be registered in Netcontent as a new record.
Note 2:
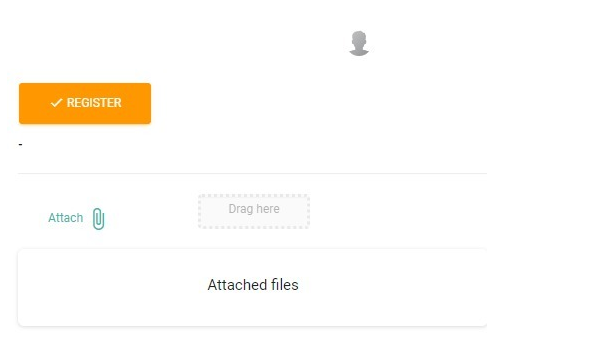
In the main flow, the module or block connected to the start must have the name you want to display on the form button. In this case, it is called "REGISTER."
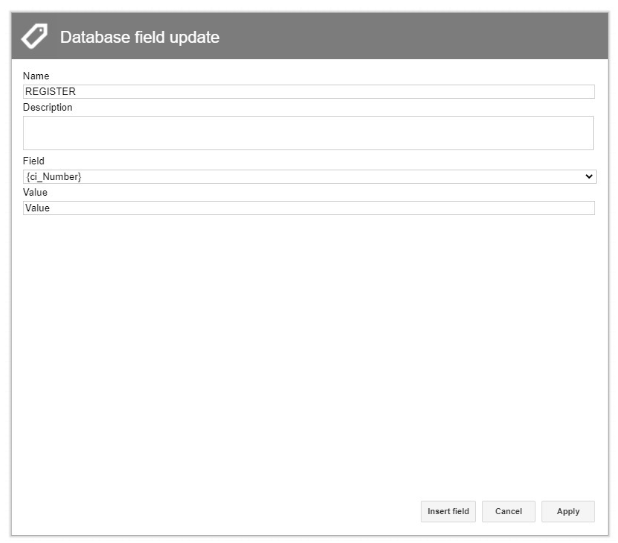
In the image below, we can see the name on the button.
Note:
It is crucial for both methods to have a "Self-Management User" activated in the system.
The self-management user is used by the system to automatically manage the visualization and registration of forms for external platform users. To do this, we need to create a user in "Users."
Created with the Personal Edition of HelpNDoc: Free HTML Help documentation generator