
Profiles
The "Profile" is the section that allows you to modify and add user data.
Search within File Type and click on "Profile  .
.
The parameters displayed on the main Profile screen are:
- #: Indicates the mapping number entered.
- Template: Corresponds to the name of the template.
- Source Path
- Actions: These are the edit, activate, and deactivate buttons for each corresponding row.


Create a New Profile
To create a new profile,  Follow these steps:
Step 1:
Define which File Type fields users can view or edit, and whether to apply access restrictions.
Create the appropriate filters for each profile: search name and selection of File Type fields.
Press the 'Next' button to continue.
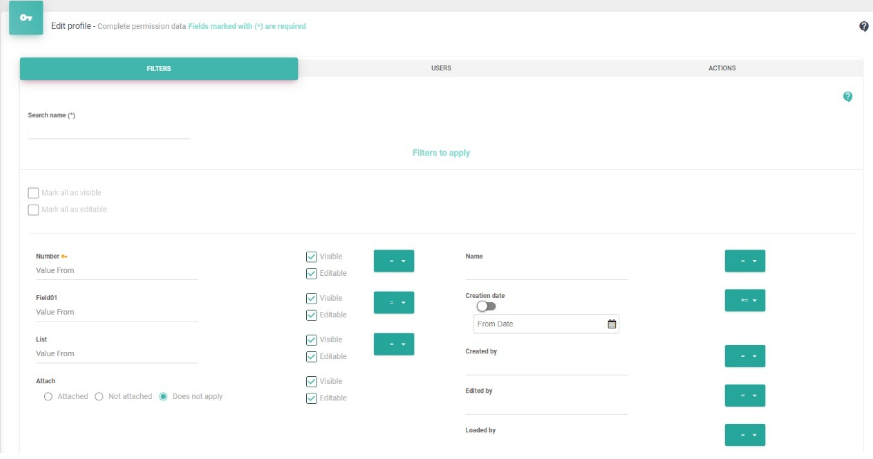

 Note:
Note:
You can use the following shortcuts to define search values for fields that are not numeric:
- The "%" character allows for approximate text searches when the exact term is unknown. For example, searching for the File name %My File% will return all Files containing 'My File' in their name.
- Inclusion or Exclusion Search: For all fields that are not numeric, you can define more than one value using a comma ",". For example, in the File name, you could search for %My File%, Budget John using the "=" operator. This would return all Files whose names contain the phrase 'My File' or are named 'Budget John'.
- Similarly, using the "!=" operator, you can search for items that do not contain that expression.
- List-type fields: allow for selecting multiple values.
- Binary option fields (YES/NO): also include the "Not Applicable" option to exclude them from the search.
- Date-type fields: are always presented in pairs to define a "from-to" range.
- For each field, you can specify whether it can be viewed or edited.
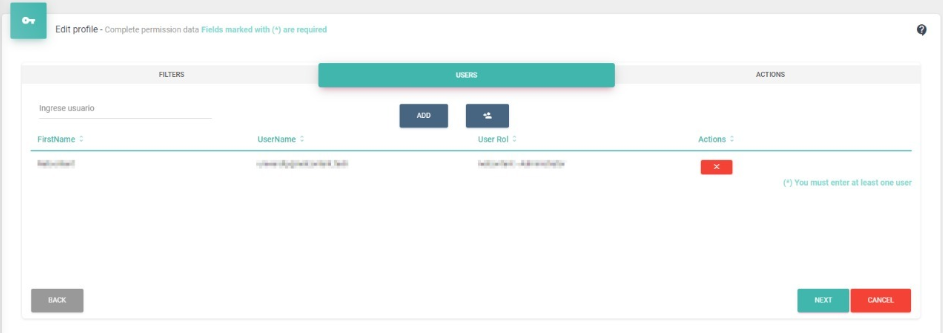
Step 2:
In this step, we select the profiles that will participate in this filter. To do this, type the name in the "Enter user" text box and select it from the list. Click the "Add" button. A grid with the added users will be displayed, including the following details: name, username, user profile, and actions (delete).
Press the "Next" button to continue."
Step 3:
Specify the actions that can be performed on Files of this type. You can see the different actions in the image below.

Created with the Personal Edition of HelpNDoc: Easily create iPhone documentation