
Signature by Viafirma
Netcontent relies on Viafirma's digital and electronic signature technology.
Configure the integration with Viafirma in Netcontent
Step 1
You need to associate the Viafirma project in Netcontent. To do so, follow these steps:
C:\NETCONTENT\netcontent-webapi\Web.config
Change the following URL pointing to the test environment:
<add key="DomainApiUrlViafirma" value="https://sandbox.Viafirma.com/documents/api/v3/" />
For this new one that points to the productive:
<add key="DomainApiUrlViaFirma" value="https://services.viafirma.com/documents/api/v3/" />
This data must be changed by the data of your project. They need to be enabled by your provider.
<!--Viafirma-->
<add key="ViafirmaOAuthConsumerKey" value="l6VPNEoaH9avSSbz9xxbmmXXKGMnkc4KomUsWQgHYUZ2Z+fvWlHrFj0/I3MDhUBe" />
<add key="ViafirmaOAuthConsumerSecret" value="Dmibl6eocC767qFU/UmvcHWcw5F3c2IXSOC77VWyY4Y=" />
<add key="ViafirmaBasicKey" value="oS890yzfDemzIbNooVvswG10o9O/X11l3X9uVxDLuEucAkhJp/ALc8cf2qA6uLOALsUJfvQAWHyS1I1Rypn3KYQDIJEnXbOq1a+JF3sm6+4=" />
Step 2
You must go to the database and change the name of the signature template referring to the project.
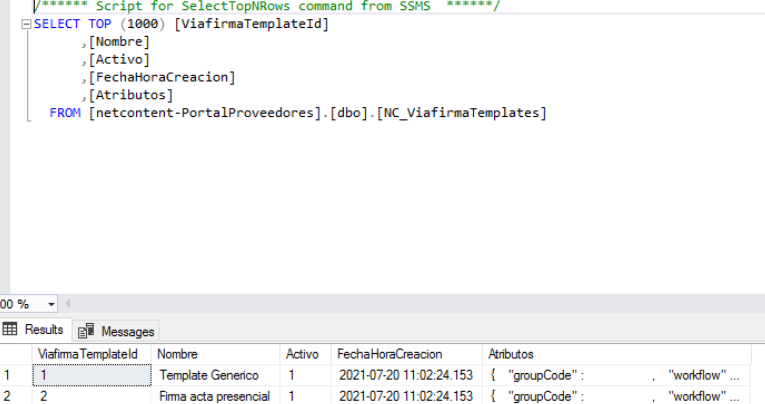
Modify the "groupCode":"<company name>" within the attributes column of the NC_ViafirmaTemplates table.
Configure in Netcontent the signature of a Type File
We must associate a digital signature task within the main flow associated with the type of File where we want to use Viafirma.
Its configuration is as follows:
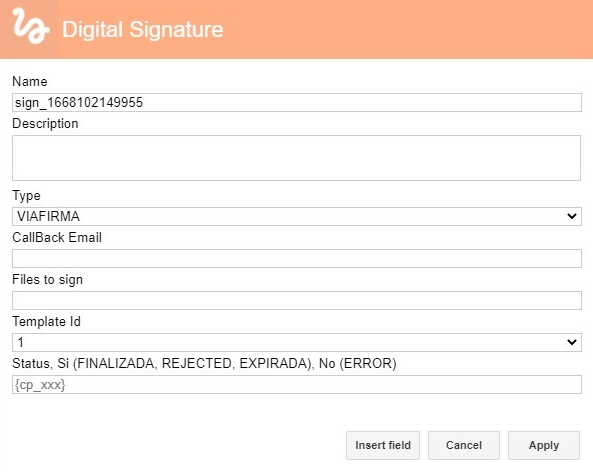
- Name: ID of the task.
- Description: Description of the task.
- Type: Type of signature to use. In this case: Viafirma.
- Control email: In Viafirma it is not used.
- Files to sign: Name of the document to sign. By default, leave the asterisk.
- Template ID: Identifier of the template to create.
- State: Variable in which the result of the signature is stored.
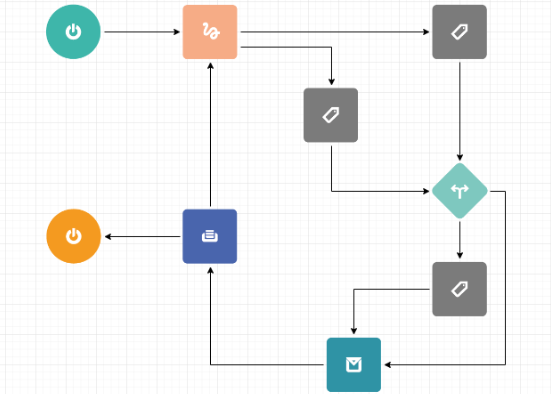
As an example, you can see the following flow where the digital signature task is used.
Signature of a document from a File
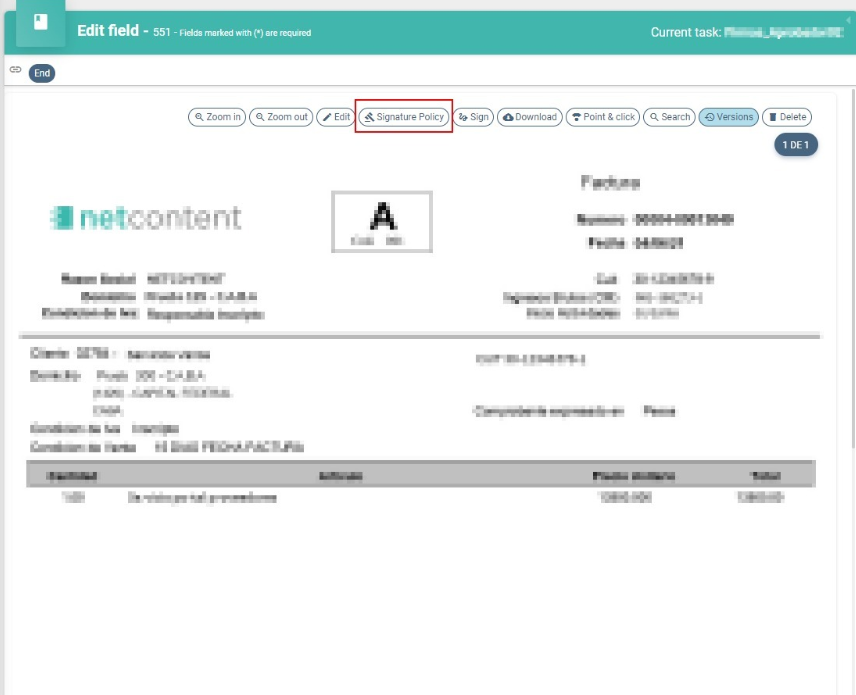
Create a new File, attach the document to be signed and then select "Signature Policy".
You can then select what type of signature evidence you want:
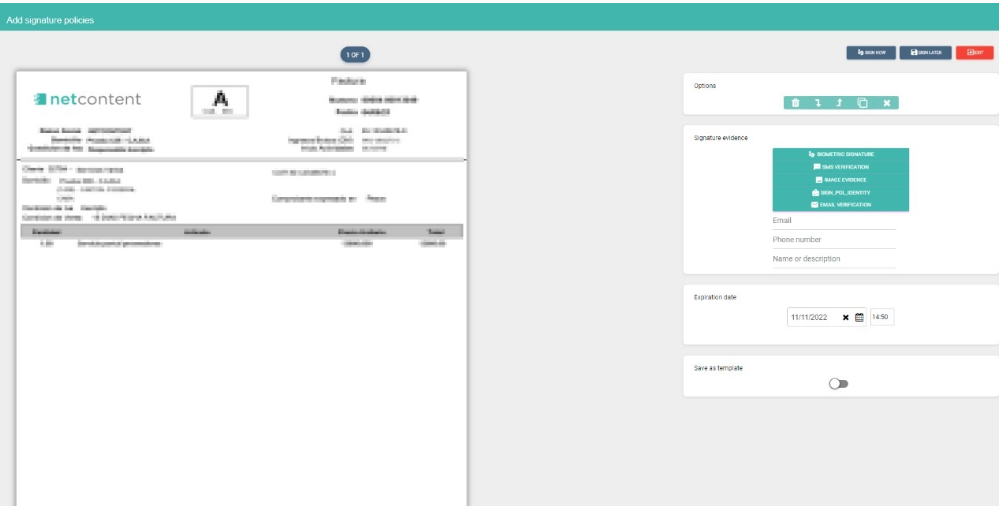
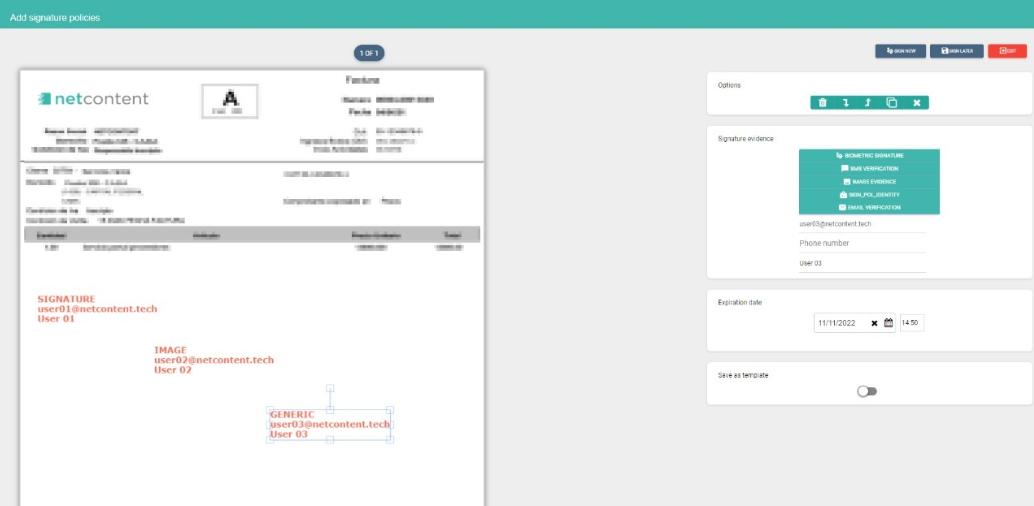
You must enter the data of the signatories and the type of signature to be made. You have the following options:
- Biometric signature: The user is asked for their handwritten signature.
- SMS verification: The identity of the signatory is confirmed by means of an OTP sent to their cell phone.
- Image evidence: Request for an image as evidence.
- Evidence of identity: It is validated with an identity document and a video of the person.
- Email verification: Verification of the identity of the signatory through an OTP sent to their email box.
Within the file you can view two types of signature modality, as shown in the image.
Sign now
It is a signature that is made at the moment and cannot be postponed. Activate the signature automatically and go to the Viafirma page to sign the document using the evidence marked above.
Sign later
It is done when the main process in which the file is involved requires it.
Created with the Personal Edition of HelpNDoc: Easily create EBooks